JUMP TO: Delivery Information | Order Items | Columns | Totals | Additional Functions | Order State
To create a customer order:
- Open your Dashboard
- Select Transactions from the Main Navigation menu on the left

- Select New Order


Delivery Information
- Input Customer name. As you type, the system will auto-fill suggestions from your customer database
- Input Bill To address
- Select Sub Account if the customer has sub-accounts for different divisions or different purchasers, etc.
- Add Attention name if it needs to be sent to an individual at a company/organization
- Select Sales Rep responsible for taking this order
- Select Expected On date
- Select Expected End date by when the order should arrive
- Add a Reference Number, if you have one
- Select Terms for payment of this order
- Input F.O.B. terms, which specifies at which point in shipping the items transfer ownership and who’s responsible, such as Origin or Destination
- Input Ship To location, which can be selected from the addresses on the customer profile or added as a New
 address
Order Items
To add items to the order:
Option 1: Scan Items
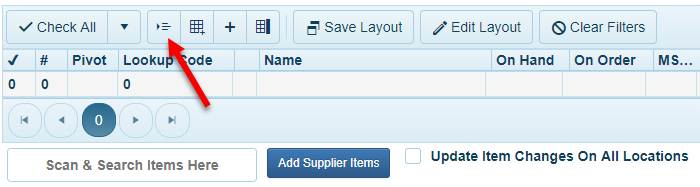
- Click inside the “Scan & Search Items Here” field
- Use a scanner to Scan items or type the items to Search. As you add items, they will appear in the table above:

Option 2: Find or Create Items
- Select Add Items
 above the table and select from the Items Finder that pops up.
 To select multiple items at a time, click and drag the mouse over the selected items:
If the item is already in the order, a popup will appear asking whether you want to Add the item as a separate row or do a Sum Qty to update the quantity of the item already in the order:
- If the item is not yet in the system, select Quick Create Item
 and fill in item information.
 - Select Add Pivot Items
 to add items based on an existing pivot table.
 - If the pivot table is not yet in the system, select Quick Create Pivot
 and create the pivot in the popup.


If an item is serialized, a popup will appear for you to enter the serial number.

Columns
The columns in the table provide comprehensive information about the order at a glance. Add or remove columns to view information such as:
- How many of this item you have On Hand
- How many of this item you have already On Order
- Whether the item is Reserved for a customer
- Item Cost for you
- Case Price if a case is purchased
- Price for your customers
And lots more. See Columns for details on what they all mean.
Select Edit Layout above the table to adjust your views.
Use Click to Open Item ![]() to go the item page and edit additional item information.
to go the item page and edit additional item information.
To add all items as a case (instead of single unit), toggle the Case option under the item list:

Totals
Totals, tax, discounts, additional charges, and customer account balance are on the right:

Additional Functions
You can also:
-
- Accept Payment in POS
- Accept Payment
- Manage Shipments
- Print the order from station or email an invoice
- Print Labels
- Email the invoice
- Push to POS to complete the order in the POS frontend
- View History of orders for this customer
- View and add Notes, which can be specified to apply to this order or to the customer in general (and viewed in the customer page)
- Create Service, such as alterations for the suit

- Upload Documents, such as return merchandise authorizations (RMAs), using the button in the BI panel on the left

Order State
To finish the order, click Save ![]() on the top right or CTRL+S.
on the top right or CTRL+S.
To change the status of the order, click the small arrow to the right of the Save button and select order status:

-
- Abort
- Close
- Close Transfer
- Void
- Open
- Deliver
- Issue
- Transfer
- For more information about the actions that these statuses trigger and allow, see Order Status.
- To create a purchase order, see Purchase Order.
- To select multiple items in the finder, see Multi Select Mode.
- If this page is used frequently, you can create a Shortcut.
- To show/hide elements in the customer order page, see Pages Setup/#orders.