JUMP TO: Supplier Information | Order Items | Columns | Totals | Additional Functions | Order State | Read Only Mode
A purchase order (PO) is a request for items from a supplier.
To create a purchase order:
- Open your Dashboard
- Select Transactions from the Main Navigation menu on the left

- Select New Purchase Order


Supplier Information
- Input Supplier name. As you type, the system will auto-fill suggestions from your supplier database (or press Enter to open the Finder). You can also add a new supplier using the [+] above the field and Edit
 once you have a supplier selected.
 - The system will auto-fill supplier address in the Supplier Info field, or you can add it manually.
- Add Attention name to direct communication to an individual at the supplier company.
- Input Bill To information, such as the branch in your company that’s creating this purchase order.
- Add a Reference Number, if you have one.
- Select Terms for payment of this order.
- Input F.O.B. terms, which specifies at which point in shipping the items transfer ownership and who’s responsible, such as Origin or Destination.
- Select Expected date of delivery.
- Input Ship To location, which can be selected from the addresses on the supplier profile or added as a New
 address.
Note: If no address is selected, the system will assume that you will be picking up this order.

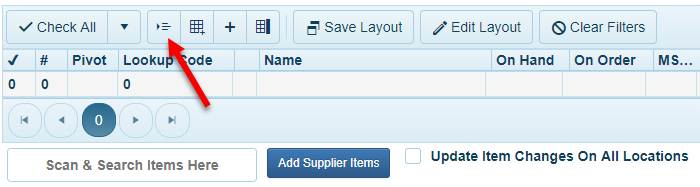
Order Items
To add items to the order:
Option 1: Scan Items
- Click inside the “Scan & Search Items Here” field.
- Use a scanner to Scan items or type the items to Search. As you add items, they will appear in the table above:

Option 2: Quick Add Items
Use the Quick Add Items toolbar above the table to quickly search items, select quantity, and other details using only your keyboard. Switch seamlessly between the fields with the Tab key.

Option 3: Find or Create Items
- Select Add Items
 above the table and select from the Items Finder that pops up.
 To select multiple items at a time, click and drag the mouse over the selected items (see also: Multi Select Mode):
 If the item is already in the order, a popup will appear asking whether you want to Add the item as a separate row or do a Sum Qty to update the quantity of the item already in the order:

- If an item is not yet in the system, select Quick Create Item
 and input item information.
 - Select Add Pivot Items
 to add items based on an existing pivot table.
 - If the pivot table is not yet in the system, select Quick Create Pivot
 and create the pivot in the popup.


- Use Split Mode
 to keep the item finder on the side of your screen while you add items (recommended for larger orders!).
Note: In Split Mode, single-click to add items (no need to double-click).

The quantity can be adjusted at the bottom of the page in the Qty field. It will automatically reset to 1 unless auto-reset is disabled (click to toggle).
Option 4: Drag In a Spreadsheet
Got a list ready? Simple drag the spreadsheet file into the items section; the items will be added without needing to locate each one in the system.
- In your Excel spreadsheet, make sure you have at least these three columns: Lookup Code, Item Name and Quantity Ordered.
- Drag the file into the items section.
- Match the column names with the system.
- Click Process at the top right of the page. The items will appear in the order’s item list.

Columns
The columns in the table provide comprehensive information about your order at a glance. Add or remove columns to view information such as:
- How many of this item you have On Hand
- How many of this item you have already On Order
- MSRP, or manufacturer’s suggested retail price
- Item Cost for you
- PO Cost for a special supplier price applied just to this order
- PO Case Cost if you receive a discounted price per case
- Item Price for your customers
And lots more. See Columns for details on what they all mean.
Select Edit Layout above the table to adjust your views.
If you change an item cost in a purchase order (use the New Cost column), it will affect just that order, not the item cost in the system. Click Copy Item Cost above the grid to copy the order-specific item cost to other relevant columns in the purchase order and recalculate totals.

To move items up or down and change their order in the table, click the item in its number column, change the number, and click Save sort order in the menu above the table.

To re-price an item for this order using existing pricing structure: Right-click any field and select Re-Price.

Use Click to Open Item ![]() to go the item page and edit the item cost throughout the system (and any other item information).
to go the item page and edit the item cost throughout the system (and any other item information).
To add all items as a case (instead of single unit), toggle the Case option under the item list:

Totals
Totals, discounts, additional charges, and your account balance with that supplier are on the right:
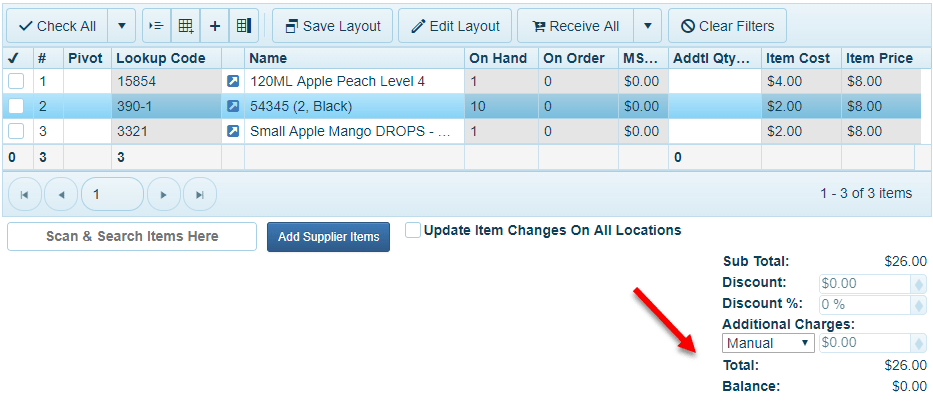
- Discount is a dollar amount to take off the order.
- Discount % is a percentage to take off the order.
- Additional Charges divides an extra charge or discount among the items in the order:
- Select Manual to manually type in the amount on each row, in the Additional $ column
- Select By Quantity to split a set amount, say $100, equally between all the items
- Select By Amount to split the amount relative to how much each item costs. This way, if one item is $50 and one item is $5, it will apply different amounts to each one.
- To divide a discount among the items, input the Additional Charge as a negative number (-100).
Additional Functions

You can also:
- Print the order

- Manage Shipments
- Print Labels for the items in this purchase order

- Email the purchase order to the supplier

- View History of the purchase order

- View and add Memos
 , which can be specified to apply to this order or to the supplier in general (and viewed in the supplier page)
 - Accept Payment using our payments page
- Upload Documents, such as RMAs, using the button in the BI panel on the left

Order State
To finish the order, click Save ![]() on the top right or CTRL+S.
on the top right or CTRL+S.
To change the state of the order, click the small arrow to the right of the Save button and select order status:

- New
- Open
- Approved
- Issue
- Receive
- US Customs
- Complete
- Abort
Read Only Mode
If you open a purchase order and it says Read Only Mode on top, that means someone else is working on that order. In order to prevent errors, you will not be able to make any changes until the other person finishes working.

Managers can override this with an admin-only Force Edit Mode. Please use with caution and keep in mind that changes made simultaneously by others might not be saved.
- For more information about the actions that these statuses trigger and allow, see Order Status.
- To receive a purchase order when it is delivered, see Receive a Purchase Order.
- To separate a purchase order into multiple invoices, see Receive PO in Multiple Shipments (Sub POs).
- To order items by quantity purchased, that are low in stock, damaged or special order, see Bulk Purchase Order.
- For customer orders, see Customer Order.
- To select multiple items in the finder, see Multi Select Mode.
- If the Purchase Order page is used frequently, you can create a Shortcut.
- To show/hide elements in the purchase order page, see Pages Setup/#orders.